T-SIM V4.5 Reference
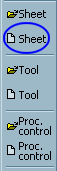
Sheet
The sheet of rectangular shape can be created within T-SIM when using the built-in sheet editor. The result of this editor is a text file which holds the geometrical and topological data of the sheet. The sheet lies on the plane xy (with z = 0), before the inflation.
To create a new sheet representation, click on the icon with the tool tip "New grid (sheet)" on T-SIM shortcut bar:
or click on File / New and select T-SIM Grid (sheet) as the document type and click OK.
The following dialog appears:

In the dialog box the following items have to be input:
Full - without plane of symmetry
Half - one plane of symmetry ; plane x = const.
Quarter - two planes of symmetry : x = const1, y = const2.
Once all the items are specified, click Create. The sheet representation is automatically created and opened for further modifications:
To edit the temperature profile of an existing sheet, open the sheet in T-SIM Grid view - click on the icon with the tool tip "Open grid (sheet)"

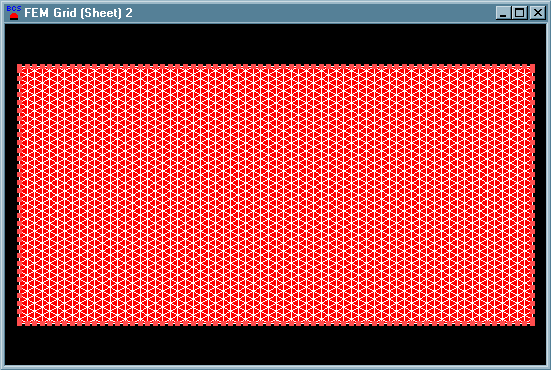
and in Windows File Open dialog, browse for the sheet file. Once the file is selected, click Open. A new window with the picture of the selected sheet appears.
Now, click Grid(sheet) / Edit temperature to change the sheet temperature inside a selected rectangular area. Then move the cursor into a required position and press and hold down the left mouse button. Move the cursor to the second corner of the rectangle and release the mouse button.
The following dialog appears asking for value of the new temperature:
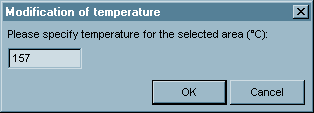
Specify the value and click OK to modify the temperature inside the area selected. To cancel the procedure of the modification of temperature, click Cancel.
If the temperature profile is changed, the sheet document
is marked as modified. When closing this document, T-SIM displays a
warning offering to save the modified sheet under a new name (i.e. Windows
File Save as dialog appears).
Before closing T-SIM Grid view, the modified
sheet can be saved also using File / Save (or File / Save as) command.
Modification of temperature profile using temperature matrix
Starting from T-SIM Version 4.5, a temperature matrix can be used to specify sheet temperature profile. For more information, please see Temperature matrix help.
Modification of thickness profileTo edit the thickness profile of an existing sheet, open the sheet in T-SIM Grid view - click on the icon with the tool tip "Open grid (sheet)"
and in Windows File Open dialog, browse for the sheet file. Once the file is selected, click Open. A new window with the picture of the selected sheet appears.
Now, click Grid(sheet) / Edit thickness to change the sheet thickness inside a selected rectangular area. Then move the cursor into a required position and press and hold down the left mouse button. Move the cursor to the second corner of the rectangle and release the mouse button.
The following dialog appears asking for value of the new thickness:
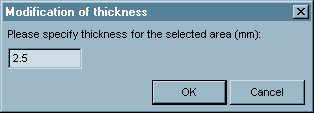
Specify the value and click OK to modify the thickness inside the area selected. To cancel the procedure of the modification of thickness, click Cancel.
If the thickness profile is changed, the sheet document
is marked as modified. When closing this document, T-SIM displays a
warning offering to save the modified sheet under a new name (i.e. Windows
File Save as dialog appears).
Before closing T-SIM Grid view, the modified
sheet can be saved also using File / Save (or File / Save as) command.
To refine an existing sheet, open the sheet in T-SIM Grid view - click on the icon with the tool tip "Open grid (sheet)"
and in Windows File Open dialog, browse for the sheet file. Once the file is selected, click Open. A new window with the picture of the selected sheet appears.
Click Grid(sheet) / Refine to refine the sheet inside a selected rectangular area. Then move the cursor into a required position and press and hold down the left mouse button. Move the cursor to the second corner of the rectangle and release the mouse button. The sheet is automatically refined.
The refinement in T-SIM Grid view is an old-fashioned way how to increase the sheet grid density in selected areas. There is no connection with the deformation of every element during the simulation of the forming process. It is hard to refine the areas of the flat sheet (before forming) where the density of grid is not high enough after forming. For this reason, more sophisticated ways of refinement are implemented in T-SIM - see Refinement from post-processing.
ClampingClamping in T-SIM is understood as a fixation of sheet grid nodes. It means that the clamped nodes cannot move in any direction. Any clamped node can be made free from its constrains and any node can be clamped. Fixed nodes (fixed nodes are not clamped nodes in T-SIM) cannot be made free from their constrains. Also nodes with boundary conditions cannot be made free from their boundary constrains. See also Nodes and their boundary conditions.
The area for clamping can be selected "by hand" or exactly using a dialog box.
To modify clamping on an existing sheet, open the sheet in T-SIM Grid view - click on the icon with the tool tip "Open grid (sheet)"
and in Windows File Open dialog, browse for the sheet file. Once the file is selected, click Open. A new window with the picture of the selected sheet appears.
Click on Grid (sheet) / Clamping. The following commands are accessible in the Clamping sub-menu:
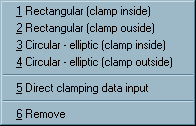
Commands 1-4:
Select required command and click it. Then move the cursor into a required
position and press and hold down the left mouse button. Move the cursor
to the second corner of the rectangle / ellipse and release the mouse
button. The clamping is immediately added inside / outside the area
selected or removed inside the area selected (the operation performed
depends on the selected command).
Command 5:
Click the command to display the following dialog:
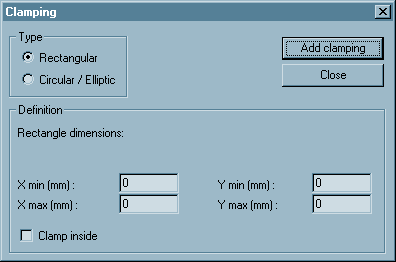
Select the clamping type to be used.
Command 6:
Click on this command and click it. Then move the cursor into a required
position and press and hold down the left mouse button. Move the cursor
to the second corner of the rectangle / ellipse and release the mouse
button. The clamping is immediately removed inside the area selected.
Sheet - modification of boundary conditions
To remove boundary condition applied on nodes, open a sheet in T-SIM Grid view - click on the icon with the tool tip "Open grid (sheet)" and in Windows File Open dialog, browse for the sheet file. Once the file is selected, click Open. A new window with the picture of the selected sheet appears.
Click on Grid (sheet) / Boundaries / Remove boundaries. Then move the cursor into a required position and press and hold down the left mouse button. Move the cursor to the second corner of the rectangle and release the mouse button. The boundary conditions are immediately removed inside the area selected. Save the sheet to keep changes.
Remark: At this moment, it is not possible to add boundary condition to nodes (except Clamping and "No pressure" flag).
Any sheet node can have "No pressure" flag.
This means that during simulation, pressure will not be applied on those
elements where all three nodes have the "no pressure" flag.
To create a new "No pressure" area, click on Grid / No pressure
areas / Create within rectangle. Then move the cursor into a required
position and press and hold down the left mouse button. Move the cursor
to the second corner of the rectangle and release the mouse button.
The "no pressure" flag is immediately added inside the area
selected.
To remove "No pressure" flag within an area, click on Grid / No pressure areas / Remove within rectangle. Then move the cursor into a required position and press and hold down the left mouse button. Move the cursor to the second corner of the rectangle and release the mouse button. The "no pressure" flag is immediately removed inside the area selected.
T-SIM Grid viewT-SIM Grid view is a window enabling to display and perform modifications of sheets (represented by T-SIM Grids). A sheet is displayed in T-SIM Grid view after creation or after opening:
To open the sheet - click on the icon with the tool tip "Open grid (sheet)"
and in Windows File Open dialog, browse for the sheet file. Once the file is selected, click Open. A new window with the picture of the selected sheet appears:
T-SIM Grid view allows to: